
Stillway shifter installation instructions
Stillway
Shifter Installation Instructions
By:
Chris RomanoDisclaimer:
Follow these instructions are your own risk. The author will not be
held responsible in any way shape or form for any damage, buy which may occur.
By following these instructions, the reader releases all responsibility,
reliability, or blame in any way shape or form.
– This document was
created in hopes of making installation of the Stillway shifter easier.– Please reference the
Stillway Shifter installation document (written in Japanese) when following
these instructions.
Page
1.– When you open the
instruction booklet, page 1 details all of the parts necessary for
installation. Verify all components and proceed to page 2.
Page
2.Diagram 1. This
details the shifter and begins preparation for removal of the shifter. Begin
by unscrewing the factory shifter.Diagram 2. This
illustrates the cover that must be removed in order to loosen the bolt that
allows the shifter to be disconnected.
This cover covers the bolt required to release the shifter from the
transmission.Note: When
jacking up the car, please take ever precaution to avoid injury. You will
need to have the car in neutral so, please double check the emergency brake.
Also, a flashlight is recommended to view the necessary components.Diagram 3. The
bolt to be removed faces the rear of the car.
There are two bolts, be sure to only disconnect the bolt, which is on
the right in the picture. You
will need a 9/16th socket to remove this bolt.Diagram 4. Remove
the leather cover from the shifter. Remove
the ashtray, open the leather cover, which attaches to the shifter and
remove the plastic piece.
Page
3.Diagram 5. With
a 10mm socket, unbolt the metallic metal cover form the bottom of the
shifter. This piece helps in
keeping moisture and noise from entering the driver’s area.Diagram 6. Now,
carefully remove the metal cover then, the rubber boot.Diagram 7. More
detail on removing the rubber boot.Diagram 8. Using
the 10mm socket, remove the metallic plate.
Note the position of the plate before removing it!
This will give you an idea of how the sequential shifter works.
Page
4.Diagram 1. Remove
the metal pin that holds the factory plastic ring on the shifter.
Basically, this piece should push out.
Be very careful not to damage any of the plastic pieces inside the
plastic ring. Personally, I cut
mine off making it easier. You
will not need this piece later on.Note:
by cutting the plastic piece, you must use the sequential shifter, Toyota
does not sell this separately, and you will need to purchase a new shifter
if you decide not to use the sequential shifter.Diagram 2. Upon
removal of the plastic ring, be sure to replace the plastic inside guide
exactly how it was inserted. Be
careful not to damage this plastic piece!Diagram 1. Take
the metallic piece and place it on the shifter.
Carefully note the position of the hole be, sure to position this
exactly how it is pictured in the diagram.Diagram 2. After
the metallic piece is placed on the shifter, use the metal wedge provided to
secure the piece. Make sure
that the wedge is perfectly centered and not sticking out on either side.
Page
5.Diagram 1. Place
the shifter back into the proper position.
Be sure not to place the shifter on backwards!***Diagram 2. Ok,
now for the important part! There
are two guides; the left guide has an angle built in.
The right guide has a square shape.
The guide with the angle should be positioned on the left such that
the angle directs the shifter towards the 3rd gear gate.
Carefully study the #2 diagram on page 5. When the shifter is in the
center position, each guide should slightly touch the square piece on the
shifter. Now, these pieces should prevent the shifter from moving left and
right and guide the shifter into 3rd then back to 4th.
Basically, in this position, you should only be able to move the
shifter into 3rd and 4th gear. Make sure the shifter
cannot be moved left and right, do not allow play yet, allow the shifter to
be moved from 3rd to fourth smoothly. Tighten the angled guide
securely and be careful not to strip the bolts!
Then, place a washer on the left bottom bolt. There are two bolts,
one towards the front of the car and one towards the rear, place the washer
on the bolt that connects to the rear bolt.
The reason I did this was to allow easier shifting into 6th
gear. In order to go into reverse, the shifter will be moved to the far
right and then back. So, when
you drive the car, be sure to be very careful not to over shift into
reverse.Diagram 3. This
describes how the shifter should easily move from 3rd to 4th
gear and not from left to right. Notice
how once the shifter is between the gates, it will guide you into 3rd
then, into 4th gear…very nice ehe?!Diagram 4. Take
the metal ring and place it on the shifter as shown in the diagram.
Then, place the C clamp so that the ring will be secured.
Page
6.Diagram 5.
First, secure the shifter onto the transmission carefully!
Reconnect the bolt that connects the shifter to the fork. Then, place
the rubber cover back over the bolt. The kit comes with 4 rings and
instructions. On my car, I did not use these rings.
My car is a 1997 so; these may not be required on other year Supras.Screw
the new shifter on gently and position the hole on the shifter so that the
small allen bolt will screw in the “L” guide on the metal ring.Adjust
the shifter so that when the ring is turned into “normal driving mode”
every gear can be reached. There
are two modes, the first is normal mode, basically lift up on the ring and
turn so that the allen bolt locks and holds the ring in an up position
allowing all shifts to occur normally.
Once the shifter is at the proper height, use the bolt provided to
secure the height. On mine, the
allen bolt faces towards the back of the car…use this as a guide to
getting it adjusted properly. Of
course, every car will be different.Now,
to engage sequential mode, put the car in first gear and turn the ring so
that the ring drops. What will
happen is, 1st gear will shift into 2nd as normal.
Then, as you shift into 3rd, the guide will set the
shifter into 3rd gear…hence reducing the number of missed
gears! Then, the guide will
guide you into 4th gear. Notice in this mode that you shifter
cannot be moved from left to right. To get it back into normal mode, lift up
on the ring and turn to lock into normal position.Once
all steps are complete, take the car for a spin and make sure all gears are
smooth. Some adjustment may be
necessary. Note that the shifts
will feel a bit shorter and will take a little getting used to.
From neutral into first, you may need to angle the shifter towards 1st.
This is normal, the gates are designed to guide all shifts more
efficiently. However, no grinding should occur!
If your car grinds, adjust the unit so that the height is correct.
Once you have finished testing the unit, replace the rubber boot and
the metal cover that secures the boot.
Then, place the plastic cover and secure the leather to the shifter
allowing the ring to move properly. Replace
the ashtray and you’re done!Now,
practice with the unit in a parking lot.
BE SURE TO TEST NEAR YOUR HOUSE!
IN CASE THE SHIFTER NEEDS TO BE ADJUSTED!I
hope this helps! Enjoy the unit and I’ll see you at the races!Thanks,
Chris
Romano
http://www.angelfire.com/ab/teamdevious

Fog light mod
Supra
by Doug
Moore


Purpose – This mod will keep the fog lights
on when the high beams are turned on.
Pros – All 6 lights up front
will be on when the high beams are on (fog, low beam, and high
beam).
Cons – The fog light switch inside the car will no longer
turn the fog lights on and off…
if your lights are on…so are the fog
lights (but when would you want less light by choice?)
The only step
required is to GROUND the 1 pin of the foglight relay.
(shown standing on the
drivers side of the car looking into the engine bay)
Note: The wire is for illustrative purposes…I have wired mine from
under the relay
so you don’t see the wire
enlarge it


![]()

R
Removing the
TRAC
Butterfly
Stock Throttle Body With Trac
Butterfly

Modified Throttle Body with No Trac
Butterfly

HKS makes a kit to Remove
the Trac Butterfly (1312-RT001 / MSRP $95)


Here are the parts that need to
be removed while using the HKS kit.


Here is a cheaper way to block
the holes after you remove the trac plate, abortion use heavy duty epoxy to fill the
holes.
This is Inside the Trac system (trac motor
side),
All removed and filled with heavy Duty Epoxy


This is another way to remove the
traction butterfly, cut it off and weld it!
Clean looking huh?


![]()
Egr mod’s
How to Defeat
the Engine Check Light after Performing ANY EGR ModWe apologize for the missing images, this article was missing for some time and brought back thanks to Archive.Org, unfortunately, some images could not be recovered
- Purpose: To
prevent check engine light from turning on after performing any egr mod.- Parts Required:
10K Ohm 1/2 watt resistor, Available
at Radio Shack (Part #271-1126), Electrical tape.- Time Required:
3 minutes.
Steps
::
Unplug the EGR gas temperature probe electrical
connector pictured below. Insert a 10K ohm 1/2 watt resistor into the connector (fig. 3).
This prevents a CPU trouble code from being tripped. Tape the connector with electrical
tape to prevent the resistor from falling out.Note:
it is hard to see the electrical connector on 97-98 models because it’s located
in the opposite position of 93-96, its between the manifold and engine valve cover towards the back
(firewall) – look for it using a flashlight. A screwdriver will help you unplug the
harness.


trd twin clutch install translated
31000-JA800
Supra (JZA80)
Twin Plate Clutch
Model number
|
Product number |
Car type |
Year |
Note |
|
31000-JA800 |
Supra (JZA80) |
After May 1993 |
For 6M/T vehicles |
Required parts for
installation (separate purchase)
q Fly wheel set bolts: 90910-02103 – 8
pieces
Enclosed parts
|
|
Parts name |
Parts number |
Quantity |
Notes |
|
1 |
Clutch cover |
31210-JA820 |
1 |
|
|
2 |
Clutch disk A |
31250-JA820 |
2
|
Clutch disk A and B are the |
|
3 |
Clutch disk B |
|||
|
4 |
Center Plate |
31292-GA800 |
1 |
With 3 return springs |
|
5 |
Fly wheel |
13451-JA800 |
1 |
|
|
6 |
Bolt A |
90110-A0071 |
3 |
M6 cap bolt |
|
7 |
Bolt B |
90101-A0104 |
9 |
M8 bolt |
Warning on instillation
q Disassemble the clutch at an authorized
factory
q Use this product only on the designated
models
q As soon as receiving this product confirm
that all the parts are included in good condition
q Before starting installing this product,
make sure that the car is parked in a flat place with side break.
q Follow the repair instruction of your
model provided by Toyota dealer.
q Before installing, make sure that the
parts are cold to avoid burns.
q If you re-use the bolts already used in
the car, make sure they are not rusty
q Make sure the bolts are securely fastened.
q Use the designated torque to securely
fasten the bolts
q Because the bolts tend to get loose
immediately after the installment, make sure to securely fasten them before
driving
q After the installment make sure this
product does not interfere with other parts. If so consult the sales agent
q If oil or water did not leak during the
installment.
Warning on using this product
q Use this product only on the designated
models
q This product may be damaged or broken
depending upon storage and driving conditions.
q Sudden acceleration or sudden turns impose
excessive burden on the product and may damage the product.
q Strong collision or shock to the vehicle
may deform or break the clutch.
Immediately inspect the product.
q If you feel abnormal vibration or noise
while driving, park immediately and inspect the product to avoid serious
accident.
q Drive at a normal speed for about 500km
immediately after installing this product.
q The position of clutch pad may move and
half-clutch operation may feel different, but it is normal. We recommend to adjust <stroke?> after
test drive.
q Depending on the usage and conditions,
friction pad significantly wears out.
Especially driving that requires frequent zero start such as drag race
wears out the friction pad significantly.
Inspect the clutch frequently.
q Frequent use of half clutch increases the
temperature of inside of the clutch and inflates or deforms the parts. If the clutch does not move smoothly, stop
the car and wait until the clutch cools down.
q You may hear wheel spinning noise, but it
is normal.
Installment instruction
- Disassemble twin plate clutch
Loosen
bolt A and B to disassemble twin plate clutch assay
- Install release bearing
Attach
release bearing to the clutch cover.
Inspect the release bearing and replace if it is a defect.
- Install fly wheel
1) Attach fly wheel to the crank shaft. Screw 8 new set bolts in the order as
indicated in the box. Further tighten
them using the following torque
Torque:
49.0Nm (500kg – cm)
2) Mark top of the set bolts (see the box)
3) Tighten the set bolts 90 degrees to the
right
4) Make sure all bolts have the painted marks
on the right.
Warning: fly wheel set bolts cannot be re-used.
- Install the clutch
1) Attach clutch cover, clutch disk A, B, and
center plate to fly wheel, and loosely screw bolt A and B. Make sure to match the triangular locks on
the clutch cover, center plate, and fly wheels.
Warning:
If the triangular locks are not properly secured, the turning balance may be
lost, causing abnormal noise and vibration.
2) Insert the ??? bar* in the hole of fly
wheel pilot and determine the position for clutch disk A and B. Dovetail clutch disk A and B.
* An improved SST (number 09301-JA000) will be
released soon.
3) Securely fasten bolt A
4) Securely fasten bolt B
Warning:
If the teeth and center of clutch disks A and B are not securely
attached/aligned, installing T/M will be difficult and may break the disks.
Warning:
Screw in each bolt half way then screw in all way. Then securely tighten them using the
specified torque.
Torque:
Bolt A- 11.8-13.7Nm (120-140kg-cm)
Bolt
B – 27.4-29.5Nm (280-300kg-cm)
Warning:
If each bolt is screwed in all way in one time, the cover may be damaged.
5) Pull out the bar.
- Confirm
After
fastening the bolts, confirm that the height of diaphragm springs are
even. If not, re-do the process 4.
- Install
T/M
Apply
designated pure grease on each moving part.
Follow Toyota repair instruction for details.
- Adjust stroke
Because
the position of clutch pad may move after installing this product, adjust the
pad cloth to the original position.
racelogic traction control installation
Racelogic Traction
Control Installation
By
Derek Wang
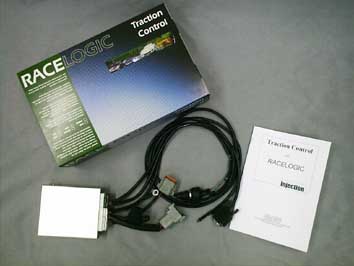
This article explains in detail the installation
of the Racelogic Traction Control System on the US Spec MKIV Supra. This
installation article was based on a US Spec ’94 Turbo Supra with TRAC. Other
years, models, and country models may differ. Please consult your factory
service manual whenever possible
To get your own Racelogic Traction
Control in the US, contact Matrix Engineering as they’re the exclusive distributor for the
RLTCS in the US.

Tools Needed:
10mm socket wrench
Wire
cutters
Razor blade
Phillips screwdriver – Various sizes
Flathead
screwdriver
Soldering iron
Overview:
The Racelogic System monitors wheel
speed independently and looks for a difference in wheel speeds larger than a
predetermined (but tunable) threshold. Once the threshold is met, engine power
is reduced by cutting each of the six injectors independently in a rapid cycle.
They system can be adjusted to give a desired level of slip (5%, 10%, 15%, 20%,
etc). Optional features include launch control, full throttle shift, and
adjustable rev limiter.
The wires we will need to tap into are the six
injector wires, the four wheel speed sensor wires, RPM wire, ignition power, and
ground. The adjuster controller will also need to be connected via three wires,
and a serial cable can also be used to interface with a laptop computer for
data logging and additional tuning.
Installation:
Disconnect the negative battery
terminal before working on any electronics on the car
Expose the ECU in
the passenger footwall by removing the plastic carpet trim which runs along the
rocker panel under the door. This will allow for the carpet to be pulled back
after the removal of a few plastic buttons, exposing the ECU cover. Remove the 2
10mm nuts securing the cover then remove the cover. You should now be able to
see the ECU and the factory TRAC computer.
Unplug and remove the TRAC
computer. You will no longer need this with the Racelogic Traction
Control
Loosen the 10mm bolt holding the twin harness plugs onto the ECU
and remove the plugs for easier access to the six injector wires. Find the
injector trigger wires E9-15 to E9-20:

These wires will
need to be cut, one side going into the Racelogic, the other side connected to
the output of the Racelogic:
From ECU side, connect to: Red, Orange,
Grey, Green, Yellow, and Pink wires of the RL.
From firewall side, connect
to: Red/Black, Orange/Black, Grey/Black, Yellow/Black, Pink/Black.
Make
sure each injector wire has the same solid color on the ECU side as the color
striped wire to the firewall side. It is not important which color RL wire
connects to which injector
Shown below is the wiring via a Fields ECU
harness. I recommend soldering these wires and using shrink tube to protect them
from exposure:

Find the RPM
signal wire, E9-58 (Igniter), and tap the Racelogic’s black/white wire into this
signal. You do not need to cut this wire. You can use a razor blade to strip the
sleeve off a small section of the wire, then solder the RL wire and carefully
tape this up with electrician tape.
*Alternate RPM wiring –
If your car has additional
devices like the HKS VPC, Apex’I S-AFC, or any other piece that is already
attached to the E9-58 igniter RPM wire, you may experience an RPM signal drop
which will cause the Racelogic to malfunction. A good alternative is to use the
E10-16 (TACHO) wire on the ECU harness for the RLTC RPM wire:

Connect the RL’s
power wire to an ignition switched power supply. This can be found on terminal
E10-1.
Ground the RL to a good chassis ground. I used one of the ECU
mounting posts by sandwiching the RL’s ring connector on the ground wires
between the chassis, and the 10mm ECU mounting nut. Make sure you get a good
ground connection here by removing any paint that may interfere with the ground
point.
Now we’re ready to wire up the remaining four wheel speed sensor
wires. Expose the ABS/TRAC computer by removing the center dash trim pieces.
First, remove the trim piece around the shift lever by firmly pulling up on the
panel:

Next, remove the
odometer cluster by removing the small screws holding the cluster onto the top
of the dash:

Remove the main
trim piece which holds the clock, and the HVAC controls. Remember to unplug the
clock, the HVAC plugs, the cigarette lighter, and the traction control
button:

With the trim
panel removed, remove the radio and the ABS circuit box and antenna relay:

This exposes the
ABS/TRAC computer which looks like this:

Unplug the left
and the center connectors, then route them out of the dash on the driver’s side.
This will allow for more room to do the wire taps. Also, route the RL’s wheel
speed sensor loom from the ECU area to the driver side footwall by going through
the center dash:

Find the wheel
speed sensor wires on the plugs which are now in the driver side footwall. We’re
looking for the (+) wheel speed sensor wires (A20-5, A20-17, A21-2, and
A21-9):

Click here for diagram of cars without TRAC
Splice
into these wires with the four RL wheel speed sensor wires similar to how you
spliced in the RPM signal wire. The order is not important:

Reconnect the
plugs back into the ABS/TRAC computer:

Find an
appropriate place to install the selector knob/launch control button. Reinstall
all panels, covers, carpet, and trim in reverse order of removal. Then you’re
done!
Testing/Troubleshoot:
Ensure
all wheel speed sensor and RPM wires are connected correctly by monitoring the
green LED on different slip positions on the selector knob. Starting from “WET”,
the first 4 settings on the knob indicate wheel speed sensor input. When each
wheel is spinning, the LED will flash according to wheel speed. The faster the
wheel spins, the faster the LED blinks. Select between all four of the settings
to monitor each wheel individually. If one setting does not show a flashing LED
while the car is moving. Check your wheel speed sensor wiring.
Test the
RPM signal in a similar fashion by turning the selector to “OFF” or 20% slip.
The higher the RPM, the more rapidly the LED will flash.
Once the wiring
is confirmed, follow RL’s instructions for
calibration.
![]()
Fmic / radiator panel pics & install
– We’ve Moved ! –
THIS PAGE HAVE MOVED TO
ITS NEW LOCATION @
YOU WILL BE DIRECTED IN
5 SECONDS, OR CLICK THE ABOVE LINK
Email: [
SupraParts@Earthlink.net
]
trd twin clutch install translated
31000-JA800
Supra (JZA80)
Twin Plate Clutch
Model number
|
Product number |
Car type |
Year |
Note |
|
31000-JA800 |
Supra (JZA80) |
After May 1993 |
For 6M/T vehicles |
Required parts for
installation (separate purchase)
q Fly wheel set bolts: 90910-02103 – 8
pieces
Enclosed parts
|
|
Parts name |
Parts number |
Quantity |
Notes |
|
1 |
Clutch cover |
31210-JA820 |
1 |
|
|
2 |
Clutch disk A |
31250-JA820 |
2
|
Clutch disk A and B are the |
|
3 |
Clutch disk B |
|||
|
4 |
Center Plate |
31292-GA800 |
1 |
With 3 return springs |
|
5 |
Fly wheel |
13451-JA800 |
1 |
|
|
6 |
Bolt A |
90110-A0071 |
3 |
M6 cap bolt |
|
7 |
Bolt B |
90101-A0104 |
9 |
M8 bolt |
Warning on instillation
q Disassemble the clutch at an authorized
factory
q Use this product only on the designated
models
q As soon as receiving this product confirm
that all the parts are included in good condition
q Before starting installing this product,
make sure that the car is parked in a flat place with side break.
q Follow the repair instruction of your
model provided by Toyota dealer.
q Before installing, make sure that the
parts are cold to avoid burns.
q If you re-use the bolts already used in
the car, make sure they are not rusty
q Make sure the bolts are securely fastened.
q Use the designated torque to securely
fasten the bolts
q Because the bolts tend to get loose
immediately after the installment, make sure to securely fasten them before
driving
q After the installment make sure this
product does not interfere with other parts. If so consult the sales agent
q If oil or water did not leak during the
installment.
Warning on using this product
q Use this product only on the designated
models
q This product may be damaged or broken
depending upon storage and driving conditions.
q Sudden acceleration or sudden turns impose
excessive burden on the product and may damage the product.
q Strong collision or shock to the vehicle
may deform or break the clutch.
Immediately inspect the product.
q If you feel abnormal vibration or noise
while driving, park immediately and inspect the product to avoid serious
accident.
q Drive at a normal speed for about 500km
immediately after installing this product.
q The position of clutch pad may move and
half-clutch operation may feel different, but it is normal. We recommend to adjust <stroke?> after
test drive.
q Depending on the usage and conditions,
friction pad significantly wears out.
Especially driving that requires frequent zero start such as drag race
wears out the friction pad significantly.
Inspect the clutch frequently.
q Frequent use of half clutch increases the
temperature of inside of the clutch and inflates or deforms the parts. If the clutch does not move smoothly, stop
the car and wait until the clutch cools down.
q You may hear wheel spinning noise, but it
is normal.
Installment instruction
- Disassemble twin plate clutch
Loosen
bolt A and B to disassemble twin plate clutch assay
- Install release bearing
Attach
release bearing to the clutch cover.
Inspect the release bearing and replace if it is a defect.
- Install fly wheel
1) Attach fly wheel to the crank shaft. Screw 8 new set bolts in the order as
indicated in the box. Further tighten
them using the following torque
Torque:
49.0Nm (500kg – cm)
2) Mark top of the set bolts (see the box)
3) Tighten the set bolts 90 degrees to the
right
4) Make sure all bolts have the painted marks
on the right.
Warning: fly wheel set bolts cannot be re-used.
- Install the clutch
1) Attach clutch cover, clutch disk A, B, and
center plate to fly wheel, and loosely screw bolt A and B. Make sure to match the triangular locks on
the clutch cover, center plate, and fly wheels.
Warning:
If the triangular locks are not properly secured, the turning balance may be
lost, causing abnormal noise and vibration.
2) Insert the ??? bar* in the hole of fly
wheel pilot and determine the position for clutch disk A and B. Dovetail clutch disk A and B.
* An improved SST (number 09301-JA000) will be
released soon.
3) Securely fasten bolt A
4) Securely fasten bolt B
Warning:
If the teeth and center of clutch disks A and B are not securely
attached/aligned, installing T/M will be difficult and may break the disks.
Warning:
Screw in each bolt half way then screw in all way. Then securely tighten them using the
specified torque.
Torque:
Bolt A- 11.8-13.7Nm (120-140kg-cm)
Bolt
B – 27.4-29.5Nm (280-300kg-cm)
Warning:
If each bolt is screwed in all way in one time, the cover may be damaged.
5) Pull out the bar.
- Confirm
After
fastening the bolts, confirm that the height of diaphragm springs are
even. If not, re-do the process 4.
- Install
T/M
Apply
designated pure grease on each moving part.
Follow Toyota repair instruction for details.
- Adjust stroke
Because
the position of clutch pad may move after installing this product, adjust the
pad cloth to the original position.