RMM Downpipe Installation Instructions
By: Dan Marohl

Remember - Click on Pictures for larger images

Preperation:

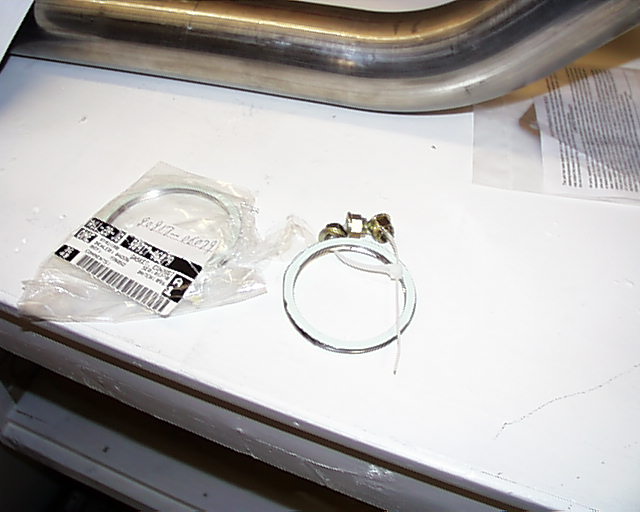
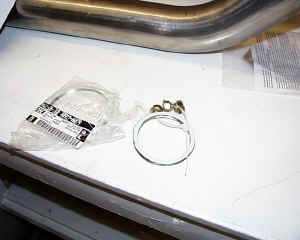
    Its a wise idea to buy a set of nuts and rear gasket from Toyota before starting the installation of the downpipe. The nuts used on the exhaust system are not intended to be re-used You can get these from the Toyota dealer for about $2 each. The original gasket 
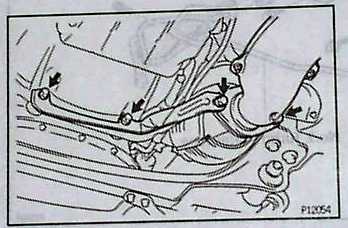
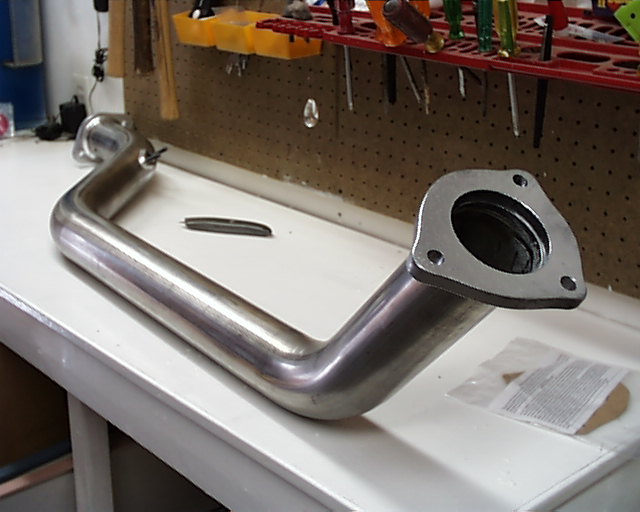
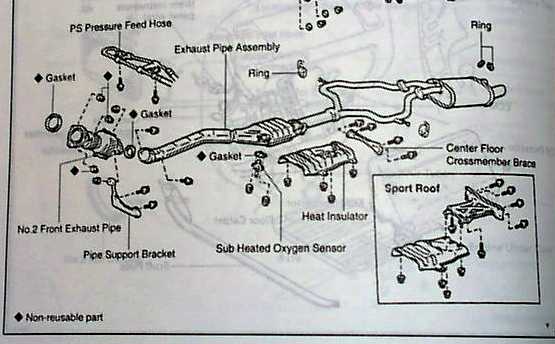
on the turbo exhaust connection will not be used again. The downpipe should contain a custom cut metal gasket. The rear gasket after the last catalitic converter will be re-used. If you need a new one, Toyota sells them for about $15. The downpipe does not have a groove for the gasket but it works just fine if care is taken to center it before the clamp is tightened.

    Tools:

    12mm wrench for O2 sensor
    14mm wrench for exhaust nuts and bolts
    14mm short socket
    14mm long socket for turbo exhaust fitting nuts
    12" or longer socket extension
    Flat blade screwdriver
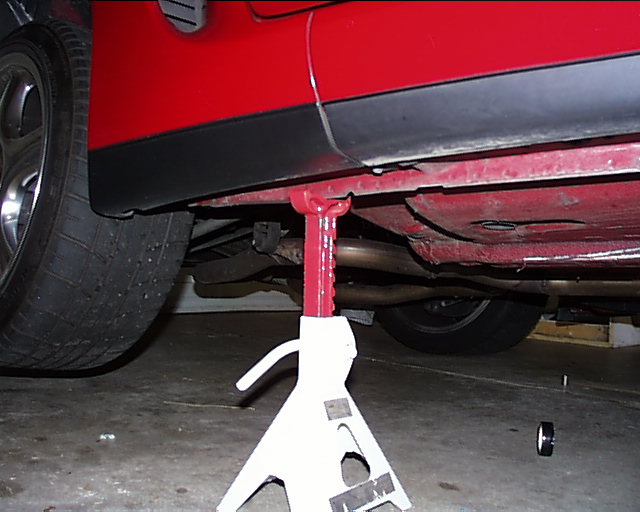
    Overview:

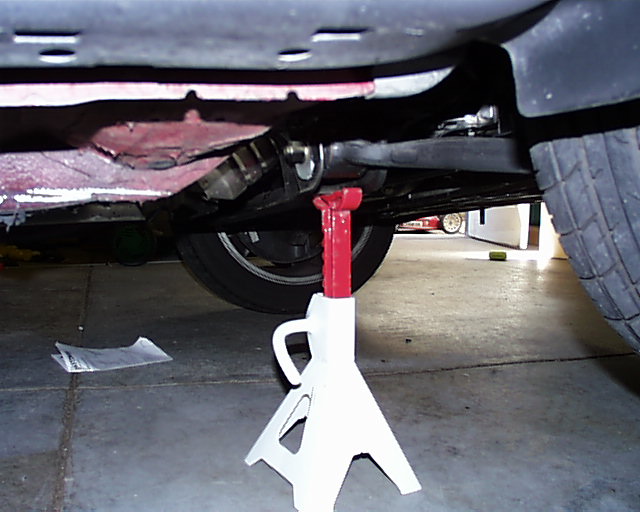
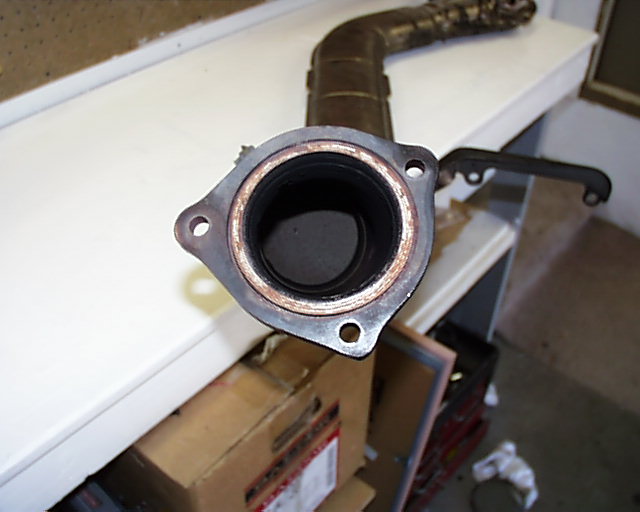
    Removal of old pipe:
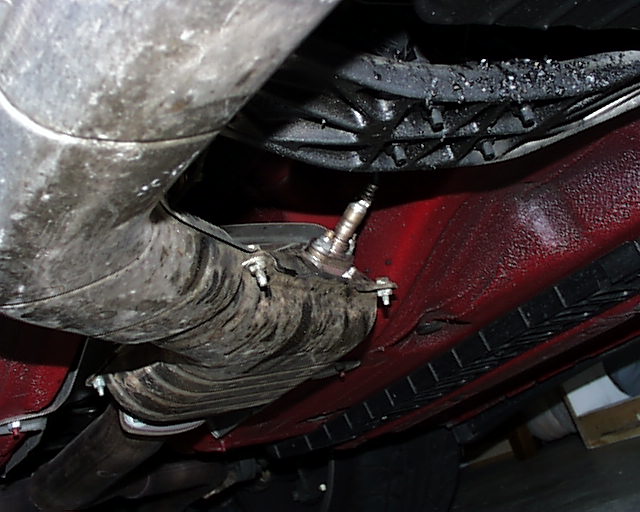
    Step #1

  • Raise the car and put jack stands under.
  • Jack stands should be placed in the following locations only. The factory manual recomends these spots for supporting the car during service. Use a floor jack placed behind the pass front wheel to raise the car at least 1 1/2 foot. The rear wheel should be off the ground also. Install the stands as shown below:
  • dp9.jpg (65046 bytes) dp10.jpg (65398 bytes)

    Step #2

  • Spray all nuts on exhaust connections with WD-40
  • Step #3

  • Remove O2 sensor and Gasket
  • Use a 12mm wrench and remove the 2 nuts that hold the O2 sensor in place. The O2 sensor is located right before the 2nd cat. Let the sensor hang but make sure the tip does not get damaged.

    • dp14.jpg (69380 bytes)

    Step #4

  • Remove the 3 nuts that hold the exhaust pipe to the turbo exhaust manifold.
  • Use the 14mm long socket and the extension to remove the 3 nuts. These nuts are located up inside the supension rack above the front cat. Two of the nuts are easy to get to but the third requires a little more work. I had to install the socket on the nut and then connect the extension in order to get the nut removed. Remember that these nuts are put on with almost 50ft lbs or force and require alot of pressure to get them off. I had to use a wrench with a long handle to get the nuts loose.
  • dp11.jpg (68435 bytes)

    Step #5

  • Remove 2 nuts and bolts holding the rear exhaust to the 2nd cat.
  • The 2 nuts are easy to remove with a 14mm wrench and a 14mm socket. Be careful not to damage the nut. They are very easy to round off with the limited access between them and the heat shield.
  • Step #6

  • Remove 1 nut and bolt that holds the exhaust support to the exhaust pipe.
  • Take the one bolt out so the support bracket is not connected to the exhaust pipe. This will allow the exhaust manifold to be removed from the car. Be careful not to break the connection between the first cat and the rear pipe.
  • Step #7

  • Remove the support bracket from the transmission.
  • In order to remove the exhaust assembly, the support bracket should be removed. It makes the process of working the exhaust out of the tight fit a little easier.
  • dp12.jpg (65099 bytes) dp13.jpg (68457 bytes)

    Step #8

  • Take the enitre exhaust manifold out (both cats and connecting pipe at once).
  •  

    Installation of new pipe:

    Step #1

  • Install custom cut gasket on turbo exhaust manifold:
  • Put the new custom gasket over the studs on the turbo exhaust manifold. If yours is like mine, it was cut by a 2 year old and didn't fit well over the studs. This lame cut helps because it hold the gasket in place while the pipe is being mounted.
  • dp16.jpg (71497 bytes)

    Step #2

  • Connect downpipe to the turbo exhaust manifold:
  • Insert the downpipe under the car so that the connection to the turbo manifold it made first. Raise the pipe and start the nuts just to hold the pipe in place.
  • Step #3

  • Install rear gasket and 2 bolts and 2 nuts:
  • Lift the pipe into place and install one bolt to hold the pipe connection to the rear exhaust manifold. Take the old round gasket from the old manifold and slide it between the downpipe and the rear exhaust manifold connections. Using a screwdriver, hold the gasket centered in the fitting and install the second bolt and nut. Take your time and tighten both nuts and bolts into place. Make sure the gasket is centered!! Tighten them to about 50ft lbs.
  • Step #4

  • Install and tighten the 3 nuts to the turbo exhaust manifold:
  • Use the 14mm socket and extension to tighten the 3 nuts to about 50ft lbs.
  • Step #5

  • Install the O2 sensor
  • Place the old gasket over the 2 studs on the downpipe. Gently place the sensor on the studs and install the two12mm nuts. Tighten them to about 20ft lbs.
  • Appendix:

  • The following pictures are for reference. Take note of the lame ass silver paint that was coating the steal flanges on the SST downpipe. This paint smells bad as it burns off in the first few drives.

dp1.jpg (62828 bytes)

dp3.jpg (65933 bytes) dp2.jpg (44043 bytes)

dp18.jpg (68215 bytes) dp20.jpg (69156 bytes)


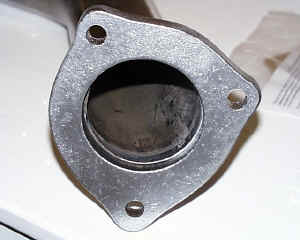
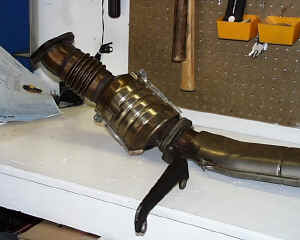
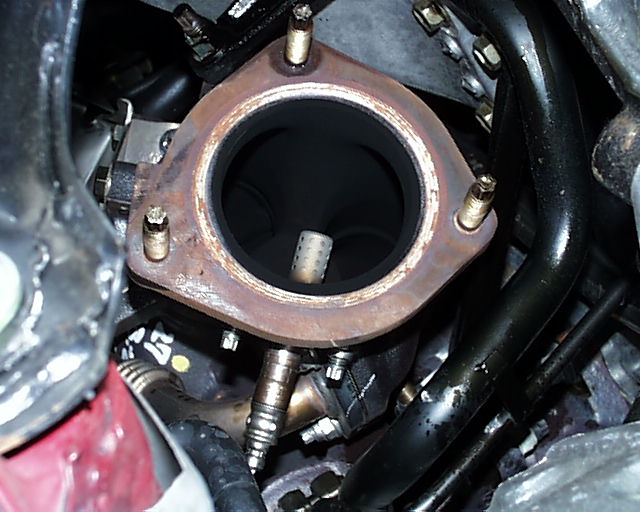
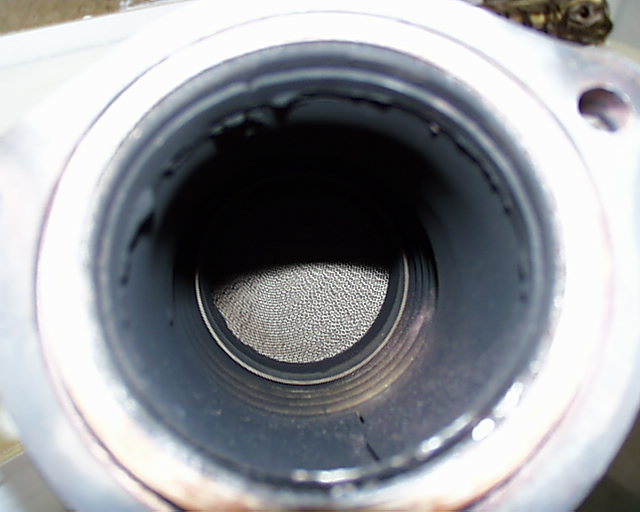
Inside the first cat, Now you can see  why you needed a downpipe.

 dp21.jpg (47993 bytes) dp22.jpg (47788 bytes)

 dp15.jpg (51268 bytes)